How to Set Up a Camping Tarp: Step-By-Step for Beginners
, by Laurence, 23 min reading time
, by Laurence, 23 min reading time
Find out how to set up a camping tarp with our step-by-step guide & the best configurations depending on your camp location. Read more at Wood To Water.
Setting up a camping tarp isn't tricky business, but there are a few different configurations and setups possible depending on where you're camping.
Practising at home is always our top tip so you're not stuck in a British downpour trying to figure out your guylines from your ridge lines. And to help you out, we've put together a step-by-step guide for beginners on how to set up a camping tarp.
From the different ways you can hang the tarp to some of our favourite tarps when we go camping, you'll find everything you need to know right here.
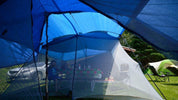
Most simple tarps can be set up in the same way – of course, you should always check the manufacturer’s instructions for any specific setup tips to make sure you get maximum protection from wind and rain.
Unlike tents, tarps don't come with tent poles or hiking poles, but they do (or should) come with guylines or ridge lines.
These ropes are used to suspend the shelter and keep it taught so that the tarp sits over a tent, sleeping bag, or camp kitchen.
Getting the tarp set up correctly is important so that you provide maximum coverage for your camping area, otherwise you might find you're not fully shielded against rain water or the shelter might fall down if you haven't secured it properly.
Follow these steps to set up a simple tarp over your tent:
| Hot to Set Up a Tarp |
|---|
|
Step 1) Work out the possible tarp configurations |
|
Step 2) Lay out your tarp flat on the ground |
|
Step 3) Secure the tarp corners to attachment points |
|
Step 4) Secure the tarp to your tent |
|
Step 5) Adjust the guy ropes and pull the tarp taut |

The shape of your tarp dictates your options for the configurations you can make. Below are the most common tarp shelter configurations by shape.
| Diamond Tarp | Flat/Square Tarp | Hexagonal Tarp |
|---|---|---|
|
Standard hammock set-up or shade sail: This is ideal for providing a sheltered area in your camp or covering your tent to increase your protection from rain. |
Classic A-Frame shelter: This is a great option for a simple but effective shelter that can be suspended between two trees. |
One of the most uniquely shaped tarps you can get, this tarp works as a ground sheet and for tarp tent set-ups. Because this tarp shape features so many corners, there’s an endless amount of potential configurations. Check out this tutorial for inspiration. |
|
Half-Tetra wed cover for a sloping shelter: This requires additional trekking poles for support points. |
Closed-end A-frame shelter: This configuration is great for keeping the wind out. |
|
|
Lean-to/Plough-point shelter: This is a super simple shelter that can be made with a single trekking pole as a support point. |
Lean-to-shelter: With a square tarp, this tarp shelter is similar to the classic A-frame but provides more shelter on one side. |
Before you start setting up your tarp shelter configurations, you need to lay your tarp flat. This will help you get your bearings, especially with a new tarp.
It also helps you work out where your attachment point needs to be concerning the natural features of your campsite.
In order to keep your tarp in place during your trip, it needs to be secured properly. You can use things such as tent stakes, poles, trees or rocks as attachment points.
You can also use guy lines and adjustable tensioners if necessary to keep things taut.
Once the corners are set up securely, attach your tent to the tarp.
Make sure to use additional guy lines for extra stability and protection from wind. This helps to create a more connected structure that provides a significant amount of ground cover and room underneath.
Once the tarp is secured to attachment points and the tent, adjust the tension of your guy lines to tighten any loose areas and ensure a snug fit.
Do some final checks to make sure that your tarp and tent are firmly secured to the ground or two trees to prevent them from flying away in strong winds.

Depending on the location you're camping in and what's available to you, there are a few different ways that you can setup a tarp shelter.
Generally, though, you'll need somewhere that you can fix the tarp to, like a tree or fence.
With that in mind, we've rounded up 5 tarp shelter configurations, along with a step-by-step on how to set them up, to help you in your next camping adventure.

Setting up a tarp shelter with a continuous ridge line is a versatile and robust method, ideal for both open and wooded areas.
The ridgeline or rope essentially suspends the tarp from two anchoring points, which is the most popular method for setting up a tarp shelter.
Here’s a step-by-step guide on how to set it up:
| 1. Find Anchor Points: Locate two sturdy anchor points, such as trees, roughly 10-15 feet apart. These will serve as the foundation for your ridgeline. |
| 2. Attach the Ridge Line: Using paracord or a similar lightweight, robust rope, tie one end to the first anchor point at a height that provides enough ground clearance but is still low enough to shelter. Use a reliable knot, such as a bowline or a clove hitch. |
| 3. Secure the Other End: Stretch the rope to the second anchor point, ensuring it's taut, and secure it using another sturdy knot. You want the ridge line to be as straight and tight as possible to provide a stable base for your tarp. |
| 4. Drape the Tarp: Lay the tarp over the ridge line, aligning it so that both sides hang evenly. This forms the primary structure of your shelter. |
| 5. Anchor the Corners: Secure the corners of the tarp to the ground using tent stakes or makeshift wooden pegs. Adjust the angle to control ventilation and resistance to wind and weather. For added stability, use guy lines to tension the tarp tightly. |
| 6. Adjust and Secure: Check the tension of the ridge line and make necessary adjustments to ensure the tarp is taut and secure. Tighten any loose lines and make sure all knots are secure. |
By following these steps, you can create a shelter that provides reliable protection in various weather conditions, making it an excellent choice for ultralight backpackers and hikers.

The reflect wedge tarp shelter is designed to reflect heat from a campfire into your sleeping area while simultaneously providing good protection against wind and rain.
This setup is particularly useful in colder weather when maintaining warmth is essential for a comfortable night outdoors.
Follow these steps to set up a reflect wedge tarp shelter:
| 1. Choose Your Site: Find a suitable flat area near a campfire site but at a safe distance to avoid any sparks or flames reaching your shelter. Ensure the area is clear of debris and potential hazards. |
| 2. Find an Anchor Point: Locate a single sturdy anchor point, such as a tree, directly opposite where you plan to have your fire. This tree will support the roof of your wedge. |
| 3. Tarp Preparation: Lay out your tarp on the ground. Fold it in half to create a triangular shape. This will form the wedge shape that acts as your shelter. |
| 4. Attach the Apex: Secure the apex (folded corner) of the tarp to the tree using a strong rope or paracord. Tie it approximately 2-3 feet off the ground, depending on the size of your tarp and the desired height of your shelter. |
| 5. Stake the Corners: Stretch the two bottom corners of the tarp away from the tree to form the open front of the wedge. Anchor these corners firmly into the ground with tent stakes, ensuring the tarp is taut. Adjust the angle to optimise heat reflection and wind resistance. |
| 6. Add Support and Stability: Use additional guy lines to secure the sides of the tarp if needed. Attach the lines to the sides of the tarp and stake them into the ground to ensure the entire structure is stable and can withstand gusts of wind. |
| 7. Position the Fire: Create your campfire a few feet in front of the open side of the wedge. The heat from the fire will reflect off the tarp and into your sleeping area, providing added warmth. |

The plough point shelter is a quick and simple setup that provides excellent protection against wind and rain. It requires minimal equipment and is perfect for ultralight camping.
Here’s how to set up a plough point shelter:
| 1. Choose Your Site: Begin by selecting a flat, open area free from obstructions such as rocks and branches. Ensure the site is not in a low spot where water might gather in case of rain. |
| 2. Anchor the First Corner: Lay your tarp flat on the ground and identify one of the corners to act as the front point of the shelter. Using a durable stake, anchor this corner into the ground firmly. |
| 3. Raise the Opposite Corner: Locate the corner diagonally opposite from the one you just anchored. Tie a length of strong cord, such as a paracord, to this corner. Attach the other end of the cord to a high anchor point, such as a tree or a trekking pole, positioned 4-5 feet above the ground. This will create the main support for your shelter. |
| 4. Stake the Remaining Corners: Stretch out the two remaining corners of the tarp to form a triangular shape on the ground. Anchor each of these corners firmly with stakes, ensuring the tarp is taut and angled to deflect wind and rain. Adjust the stakes as needed to maximise stability. |
| 5. Reinforce the Shelter: For added stability, consider using guy lines attached to the sides of the tarp. Secure these lines to the ground using additional stakes or nearby rocks. This will help prevent the shelter from collapsing due to strong winds |
| 6. Adjust and Perfect: Finally, adjust the tension of the tarp and all lines to ensure a snug and stable setup. Make sure the shelter is pitched in a direction that protects the entrance from prevailing winds. |
This setup is ideal for minimalist backpackers and hikers seeking a reliable and easy-to-assemble shelter solution.

Setting up a kayak bivvy tarp shelter doesn't require a kayak. Instead, you can use hiking poles to create a stable and spacious shelter without the need for trees or other natural anchor points.
This method is highly versatile and suitable for various environments, especially open terrains. Follow these steps to set up an A-frame shelter using hiking poles:
| 1. Prepare the Tarp: Lay your tarp flat on the ground. Identify the centreline of the tarp, which will become the ridge of your A-frame shelter. |
| 2. Position the Hiking Poles: Extend two hiking poles to the desired height for your shelter. This height can vary depending on your needs, but around 4-5 feet is a common choice. Place the poles at either end of the centreline of the tarp. |
| 3. Secure the Poles: Stand one hiking pole upright and place the tip through a reinforced grommet or loop at one end of the tarp's centreline. Repeat this process with the other hiking pole at the opposite end. Ensure both poles are upright and at equal heights to form the ridge line of your A-frame. |
| 4. Stake the Ridge Line Ends: Using durable stakes, anchor the corners of the tarp directly at the base of each hiking pole. This will keep the ridge line taut and provide structure to your A-frame shelter. |
| 5. Stake the Remaining Corners: Stretch out the remaining corners and sides of the tarp to form the A-frame shape. Anchor each corner with stakes, ensuring the tarp is pulled tight and forms a clean, symmetrical structure. |
| 6. Adjust Guy Lines: For added stability, attach guy lines to the midpoints of the long sides of the tarp. Secure these guy lines to the ground with additional stakes, positioning them at a slight outward angle to maximise stability against wind. |
This method is highly effective for hikers and campers who prefer to use their trekking equipment to create a versatile, lightweight, and easily adjustable shelter.

Attaching a tarp shelter to the side of a van offers a versatile, quick, and effective way to create additional covered living space.
This setup is perfect for campers and road trippers looking to expand their sheltered area without the need for complex equipment.
Here’s how to set up a tarp shelter on the side of a van:
| 1. Attach the Tarp to the Van: Locate the side of the tarp that will attach to the van. Use suction cup anchors or magnetic hooks, attaching them to the roof or side of your van at regular intervals (around 1-2 feet apart) to ensure even distribution of weight and stress. Clip or tie the tarp to these anchors securely. |
| 2 .Raise the Opposite Edge: Extend two poles (such as tent poles or sturdy trekking poles) to the desired height of your shelter and place them at the outer corners of the tarp, creating an awning effect. Adjust the height of the poles to your preference, keeping in mind that a steeper angle provides better rain runoff. |
| 3. Secure the Poles: Anchor the base of each pole into the ground using sturdy stakes. Make sure the poles are vertically stable and securely in place. |
| 4. Stake the Remaining Edges: Stretch out the sides of the tarp to create tension. Using additional stakes, secure the corners and edges of the tarp to the ground. Position the stakes at slight angles away from the van to maximise stability. |
| 5. Adjust and Stabilise: For added stability, use guy lines. Attach them to the midpoints of the three free edges of the tarp and secure them to the ground with stakes positioned away from the tarp at an outward angle. Adjust the tension to ensure the tarp is tight and stable. |
This setup excels in providing protection from the elements while creating an extended outdoor living area, perfect for cooking, relaxing, or simply enjoying the scenery during your camping adventures.
At Wood To Water, we’ve handpicked a great selection of high-quality tarps for all types of campers.
Our range includes ultra-lightweight, waterproof and durable options that’ll keep you dry and comfortable while camping in any weather condition.
We’ve put together a list of five tarps from our expert’s top tarp tent setup recommendations for camping.
| Camping Tarp | Key Specs | Ratingout of 5 |
|---|---|---|
|
4.5 |
|
|
4 |
|
|
4 |
|
|
4.3 |
|
|
3.5 |
Protecting yourself and your camping gear from Mother Nature is easy with the right tarp shelter, no matter what type of camping you’re doing.
A tarp tent is an excellent addition to any camping trip, providing shelter from the elements and extra protection for your tent. They are easy to set up, lightweight, and can be used in a variety of ways.
So make sure you’re prepared for whatever the weather throws at you – shop the tent tarps here at Wood To Water, and get out in nature all year round!


